If you ever find yourself in the kitchen wondering what to dream up for dinner, you know how often onions play at least a supporting role in the final presentation. Chopped in salads, sautéed with bell peppers or emanating their savory essence in soups and casseroles, the versatility of onions makes cooking less of a chore and more of an adventure.
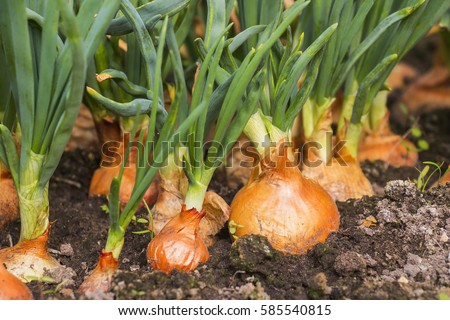
But that could also be said of growing onions, whether you want to grow sweet onions, red onions, leeks, shallots, chives or scallions (aka green onions). Because they're a cool-weather crop, they can be sown indoors in early spring or planted outdoors and covered with about a quarter inch of soil. It's amazing how quickly they sprout; you should see their green sprouts emerging from the ground in seven to 10 days.
Onions, says master gardener Brandon Marshall, can be grown from seed, sets or transplants. Here's an interesting tip: Round onion sets will produce a flattened onion, while a tear-shaped or elongated onion produce a round onion, Marshall says. Ironically, large sets grow green onions while the smaller ones are left in the ground to form bulbs. Rodale's Organic Life explains the differences:
Transplants are pencil-sized seedlings started in the current growing season. They're sold in bunches, usually through nurseries and mail order. They form bulbs quickly — 65 days or so — but are more susceptible to disease, and the cultivars are limited.
These should go into the ground four to six weeks before the last hard freeze of the spring (which even for veterans can be difficult to determine). Try mounding up loose soil and inserting no more than an inch of the bulb itself, which may leave several more inches above the ground.
Sets, with an even more limited list of available cultivars, are dry, immature bulbs grown the year before. They're easier to plant, earliest to harvest and least prone to disease. The downside is a tendency to bolt, i.e., flower prematurely. A pound of onion sets produces about 50 feet in a row.
Onion sets are often identified only as white or yellow rather than a specific cultivar name, which makes variety identification a bit of a mystery unless you know what they are and where they came from. Half-inch-long bulb sets are least likely to bolt. Once an onion bolts or flowers, use it first and as soon as possible, because the green flower stalk that emerges through the center of the bulb prevents storage for more than a week or two.
Seeds usually have the widest variety availability; however, the growing time, obviously, increases to about four months to maturity, so especially in the coldest growing zones, you can start plants indoors under grow lights or cold frames (in which case they can be planted even earlier) to get the most out of your season.
When the seedlings are 2 or 3 inches tall, you can begin moving them to the transplanting stage by first hardening them off — getting them used to outdoor temperatures — by exposing them on a back porch or otherwise "in between" area, gradually.
Article Source: mercola.com


